Add user-defined model
If you want to see the time variation of the another data such as external temperature sensor, you can add the user-defined graph. In this chapter, we show the steps to add the model.
Prepare the script
At first, you need to prepare a python script for getting the value to draw on the graph. The script must satisfy these requirements.
The process to get the value needs to be included in single python script
The filename of the script has suffix of
.pyThe value is output to stdout on single line and no other data should be output.
The type of the value should be
intorfloat
Here the simple example is shown. This file, whose file name is radom_int.py, will output a random value from 0 to 1 to the stdout by executing.
import random

i = random.random()
print(i)
And you should check that the script work as expected.
>>> python random_int.py
0.21607009789064113
Register the script.
The next step is to register the script you prepare to the rstatmon. To do this is simply executing rstatmon -n <script_name>. The following is the our case.
>>> rstatmon -n random_int.py
register : random_int.py
Add new model
After registering, you can add the new graph from the user-model page. When log in to rstatmon and access the user-model page from the navigation on the left, you would see the page as shown below. The message telling there is no model is shown because you haven’t add the graph yet.

The added model
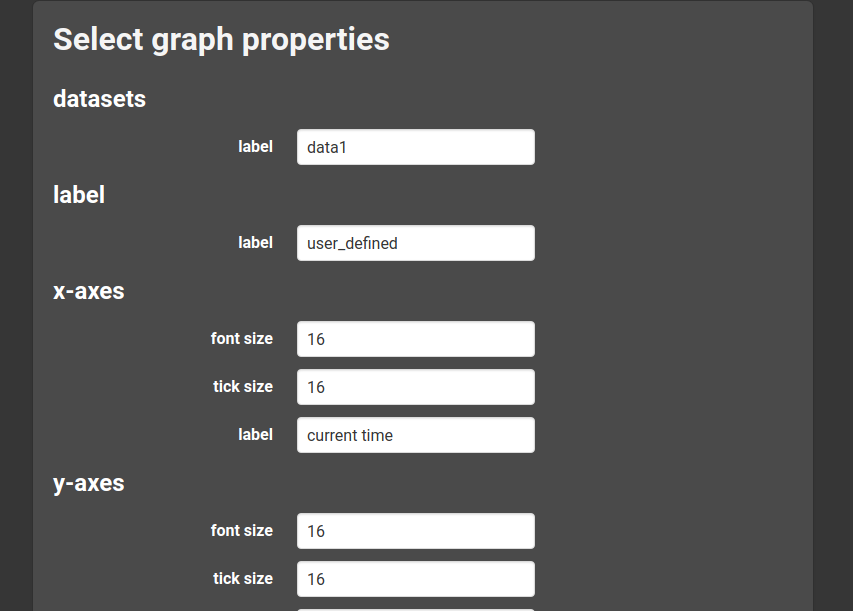
Clicking on the add tile will take you to a page where you can configure the settings for the graph you want to add. Select the graph settings you want to add, such as the axis range and scale. The defalut value is set in each box, but you can also set your own choice. Here are some of the terms needed to set up a graph.
- datasets label
This means the name of label shown on top of the graph
- label
This means the title shown in the user-model page after adding the graph.
- streaming refresh
This means how often the data will be retrieved. The unit is millisecond. Setting this to 1000 corresponds to get the data at intervals of 1 second.
- streaming duration
This means how long the data will be displayed in the graph. The unit is millisecond. Setting this to 10000 corresponds to the most recent 10 seconds of data being displayed on the graph.

The page of selecting some properties
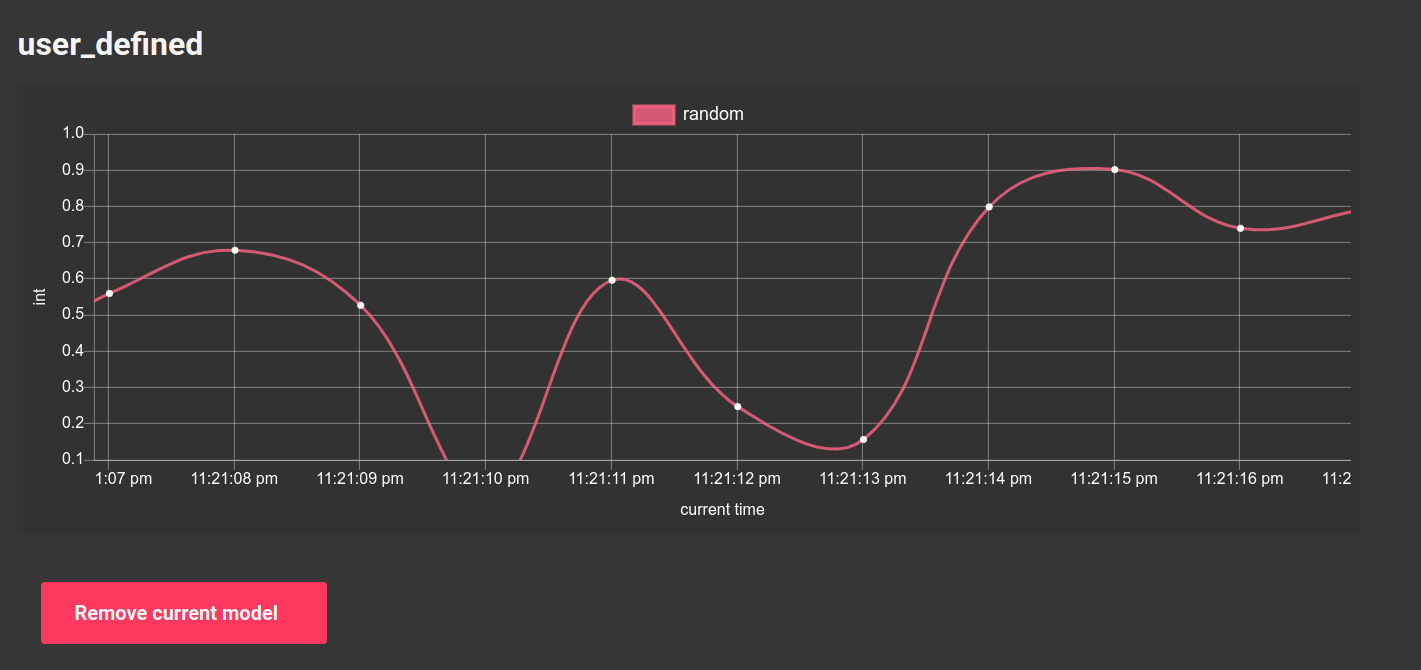
After setting the value, then click submit button to save the values. If all the values are valid, you will be redirected to the results page. The new graph is added and updated in the user-model page.
Warning
After completing the step, you need to restart the server, otherwise the change doesn’t reflect the webpage. To restart, just abort the app by entering ctrl+C and then run the app again.

The newly added graph
If you want to change the model, click remove the model to delete the current graph then repeate the above steps.
Warning
You should restart the server after removing the current model as when add the graph.